Discover how to calculate asphalt requirements for projects using our comprehensive asphalt calculator guide.
An accurately calculated asphalt project saves time, money, and prevents waste. Whether you’re a DIY enthusiast or a professional contractor, understanding how to use an asphalt calculator is key to ensuring your paving projects meet quality standards while staying on budget.
| For personalized, precise asphalt estimates, visit our FREE Asphalt Calculator for a user-friendly experience that helps tailor your project needs. |
Table of Contents
When planning any asphalt project, knowing exactly how much material you need is essential. An asphalt calculator simplifies this process by converting your project dimensions into an accurate material estimate. This tool helps you avoid ordering too much or too little asphalt, ensuring a smoother project execution. In this guide, we will explore the ins and outs of asphalt calculators, outline step-by-step instructions on using them effectively, and provide real-world applications along with cost estimation tips. Our aim is to help you gain confidence in your asphalt planning and deliver high-quality paving projects.
Understanding the Basics of Asphalt Calculation
Accurate planning starts with a clear understanding of the fundamentals behind asphalt calculation. This section breaks down what an asphalt calculator is, why it’s crucial for your project, and the key components that drive accurate results.
What is an Asphalt Calculator?
An asphalt calculator is an online tool that helps you determine the quantity of asphalt required for a project. By inputting specific dimensions as length, width, and depth—the calculator converts these measurements into cubic yards or tons of asphalt needed. This tool is indispensable for projects ranging from small driveways to large parking lots.
Why Use an Asphalt Calculator?
Using an asphalt calculator offers several benefits:
- Accuracy: It minimizes human error by automating complex calculations.
- Cost-Effectiveness: By providing precise estimates, it helps you avoid excess material purchases or underestimations that can derail your budget.
- Efficiency: The calculator streamlines the planning process, allowing you to quickly adjust variables for different project scenarios.
- Project Planning: It supports timely project scheduling by providing quick estimates, aiding in procurement and project management.
Key Components of an Asphalt Calculator
A quality asphalt calculator considers several critical factors:
- Dimensions: The length, width, and depth of the area to be paved.
- Material Density: Asphalt’s weight per cubic yard or ton, which affects the final calculations.
- Volume Conversion: Conversion factors that translate cubic measurements into weight or vice versa.
- Additional Adjustments: Some calculators allow you to factor in compaction rates and weather-related adjustments to ensure durability.
Understanding these components is the first step to harnessing the full potential of an asphalt calculator.
How to Use an Asphalt Calculator Effectively

Mastering the use of an asphalt calculator requires knowing the steps involved in inputting and adjusting your project details. Here’s a practical guide to ensure you get the most accurate results.
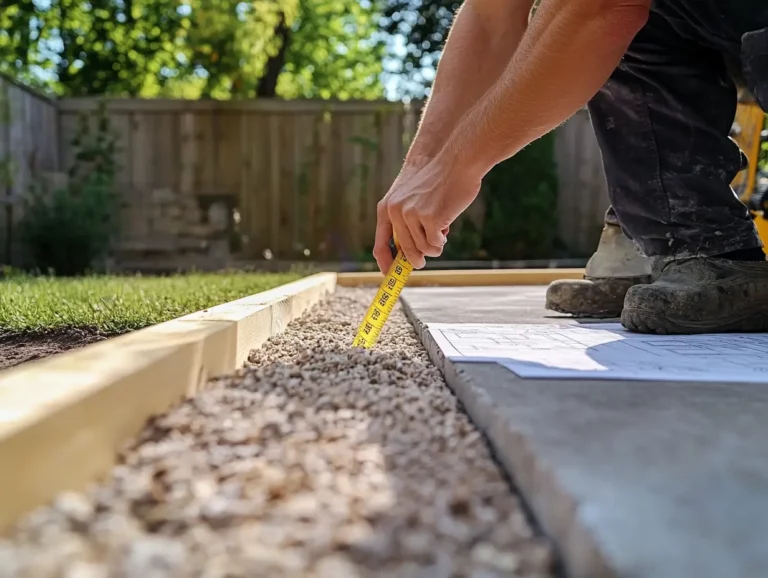
Step 1: Input Your Project Dimensions
Begin by measuring the area where the asphalt will be laid. Use a tape measure or laser distance tool to determine the length and width of the surface. Then, decide on the depth—this is typically influenced by the type of project:
- Driveways: Commonly range between 2 to 3 inches.
- Parking Lots: May require a deeper application for durability.
- Roads: Often need several inches of asphalt for proper load distribution.
Once measured, enter these dimensions into the asphalt calculator. This initial step provides the raw data that will be processed into material estimates.
Step 2: Account for Depth and Area Variations
Not all projects are uniform. For instance, curves or irregular shapes may require additional calculations:
- Irregular Shapes: Break the area into smaller, regular shapes (rectangles, triangles, circles) and calculate each separately.
- Varying Depths: Some projects might have thicker edges and thinner centers. Input these variations into the calculator if the tool supports multiple depth entries.
- Expansion Factors: Always consider an extra margin (typically 5–10%) for unexpected variations or compaction differences.
This approach ensures that your estimate covers all aspects of your project, reducing the risk of material shortage.
Step 3: Adjust for Material Properties and Weather Conditions
Asphalt is influenced by environmental factors:
- Temperature Fluctuations: Weather can impact how asphalt compacts and cures. Some advanced asphalt calculators let you adjust for seasonal variations.
- Material Composition: Different asphalt mixes have varying densities. Confirm the density of the mix you plan to use, and adjust your input accordingly.
- Site Conditions: The soil and sub-base conditions can influence the depth and overall quantity of asphalt needed.
By fine-tuning these variables, your asphalt calculator will provide a more reliable estimate tailored to your specific project conditions.
Detailed Asphalt Calculator Guide for DIY and Professionals
Whether you’re a seasoned contractor or a DIY enthusiast, a detailed guide on using an asphalt calculator is invaluable. Here, we explore real-world applications and common challenges to help you optimize your project planning.
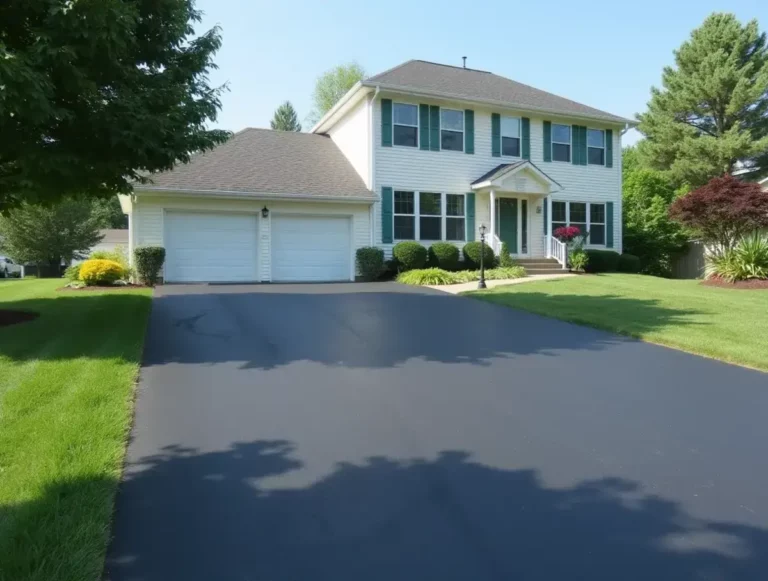
Real-World Application: Calculating a Driveway
For many homeowners, installing or resurfacing a driveway is a common asphalt project. Let’s break down the process:
- Measure Accurately: Begin with precise measurements of the driveway’s length and width. Consider any curves or irregular sections separately.

- Determine Depth: For a typical residential driveway, a 2 to 3-inch depth is common. Enter this measurement into your asphalt calculator.
- Calculate Total Volume: The calculator will convert these inputs into a total volume of asphalt needed, usually expressed in cubic yards.
- Order with Confidence: Use the estimate to order the appropriate amount of asphalt, adding a margin for compaction and potential errors.
This straightforward process ensures you have the right quantity for a smooth, durable driveway.
Real-World Application: Paving a Parking Lot
Commercial projects such as parking lots require more detailed planning:
- Break Down the Area: Divide the lot into sections if it has multiple curves, islands, or irregular sections.
- Adjust for Higher Loads: A thicker layer of asphalt is often required due to heavier traffic. Input the recommended depth based on local building codes or contractor advice.
- Factor in Additional Layers: Some parking lots may require a base layer and a top layer. Calculate each separately and combine the totals.
- Verify with On-Site Inspections: Once the preliminary calculations are complete, perform an on-site review to ensure no section is overlooked.
This methodical approach helps professionals manage large-scale projects while maintaining budget and quality control.
Common Pitfalls and How to Avoid Them

Even with a reliable asphalt calculator, some challenges can arise:
- Measurement Errors: Inaccurate measurements lead to incorrect estimates. Double-check your dimensions before inputting them.
- Ignoring Extra Margins: Failing to account for extra material for compaction can result in shortages. Always add a buffer.
- Overlooking Environmental Adjustments: Weather and material density variations can affect results. Use an asphalt calculator that allows for these modifications.
- Relying on a Single Estimate: For complex projects, cross-check estimates with multiple calculators or consult with experts to verify accuracy.
By being mindful of these potential pitfalls, you can ensure that your asphalt project is executed flawlessly.
Cost Estimation and Budgeting with an Asphalt Calculator
Budgeting is a critical component of any construction project. An asphalt calculator not only provides material estimates but also serves as a tool for cost estimation.
Calculating Material Costs
The primary cost in any asphalt project is the material itself:
- Determine Total Volume: Use the asphalt calculator to obtain the total volume needed.
- Know the Price per Unit: Research current market rates for asphalt per ton or cubic yard.
- Multiply and Add Margins: Multiply the volume by the unit cost and include a contingency margin (typically 5–10%) to cover price fluctuations.
This process gives you a ballpark figure that is essential for securing financing or adjusting your project scope.
Incorporating Labor and Additional Factors
Material costs are only part of the overall budget. Consider these additional factors:
- Labor Costs: Depending on the complexity of the project, labor can account for a significant portion of expenses. Factor in hourly or daily rates.
- Equipment Rentals: Special machinery may be required for excavation, compaction, and finishing.
- Site Preparation: Costs for grading, drainage improvement, and base installation should also be included.
- Permits and Inspections: Ensure that you factor in the costs of obtaining necessary permits and post-installation inspections.
A detailed budget that includes these variables will help you stay on track financially and avoid unforeseen expenses.
Tips for Budget Optimization
To maximize your budget:
- Get Multiple Quotes: Compare prices from different suppliers and contractors.
- Plan Ahead: Avoid last-minute orders, which often come with premium charges.
- Invest in Quality: Skimping on materials or labor can lead to costly repairs in the future.
- Utilize an Asphalt Calculator: Regularly use your asphalt calculator to update estimates as your project progresses, ensuring you always have current data to inform your decisions.
By following these budgeting tips, you can optimize your project costs while ensuring high-quality results.
Practical Tips and Best Practices for Asphalt Projects
Planning and execution go hand in hand. Here are some best practices that will enhance your asphalt project from start to finish.
Preparing the Project Site
The success of an asphalt project begins with thorough site preparation:
- Clear the Area: Remove any debris, vegetation, or old pavement that could interfere with the new asphalt.
- Level the Surface: Ensure the base is even and compacted to support the new layer.
- Install Proper Drainage: Good drainage prevents water accumulation and extends the life of the asphalt.
A well-prepared site is the foundation of a long-lasting pavement, and using an asphalt calculator helps ensure you have enough material to cover all prepared areas.
Choosing the Right Asphalt Mix
Not all asphalt is created equal. The mix you choose can affect durability, cost, and appearance:
- Standard Mixes: Ideal for residential driveways and low-traffic areas.
- High-Performance Mixes: Best suited for heavy traffic areas like parking lots and roadways.
- Climate Considerations: In regions with extreme temperatures, select a mix that can withstand thermal expansion and contraction.
Consulting with experts or suppliers can help you choose the right asphalt mix for your project needs.
Maintenance and Longevity Considerations
Even the best-laid asphalt requires proper maintenance:
- Regular Inspections: Look for signs of wear, cracks, or potholes.
- Sealcoating: Periodic sealcoating protects the surface from the elements.
- Timely Repairs: Address small issues before they become major problems.
By integrating regular maintenance into your project plan, you can extend the life of your asphalt and protect your investment.
Final Thoughts and Reader Interaction
A well-planned asphalt project starts with accurate calculations. An asphalt calculator is an indispensable tool that not only ensures you have the right amount of material but also aids in budgeting and efficient project management. Whether you’re paving a driveway or constructing a large commercial parking lot, understanding the process and potential challenges can save you both time and money.
We hope this comprehensive guide has provided you with valuable insights into using an asphalt calculator effectively. Your feedback is important to us. Please share your experiences, ask questions, or leave a comment below. We also invite you to check out our related articles on asphalt paving techniques and maintenance tips for asphalt surfaces for more detailed information.
FAQ
How do I calculate how much asphalt I need?
To calculate asphalt requirements, measure the area’s length, width, and desired depth. Input these values into an asphalt calculator to determine the volume, then convert that volume into tons based on the asphalt mix’s density.
How much does a 20×20 asphalt driveway cost?
Costs vary based on location, material quality, and labor. Generally, a 20×20 asphalt driveway may cost between $1,000 to $3,000. It’s best to use an asphalt calculator along with local quotes for a precise estimate.
How much area will 1 ton of asphalt cover?
Typically, 1 ton of asphalt covers about 80–100 square feet at a standard thickness. However, this can change with varying depths and mix types. Always refer to specific product guidelines and use an asphalt calculator for more exact coverage.
How to calculate the cost of asphalt?
Begin by using an asphalt calculator to determine the total volume needed, then multiply by the current cost per ton or cubic yard. Add labor, equipment, and other project-specific expenses to reach the final cost.